
Microsoft Entra Domain Services | 4.0 Erstellen einer Azure Admin VM
- Thomas Schmid

- 27. Juli 2025
- 3 Min. Lesezeit

Melden sie sich beim Azure Admin Portal an
Fenster "Microsoft Azure - Azure services"
+ Create a resource >

Fenster "Microsoft Azure - Create a resource"
Unter Virtual machine
Create >

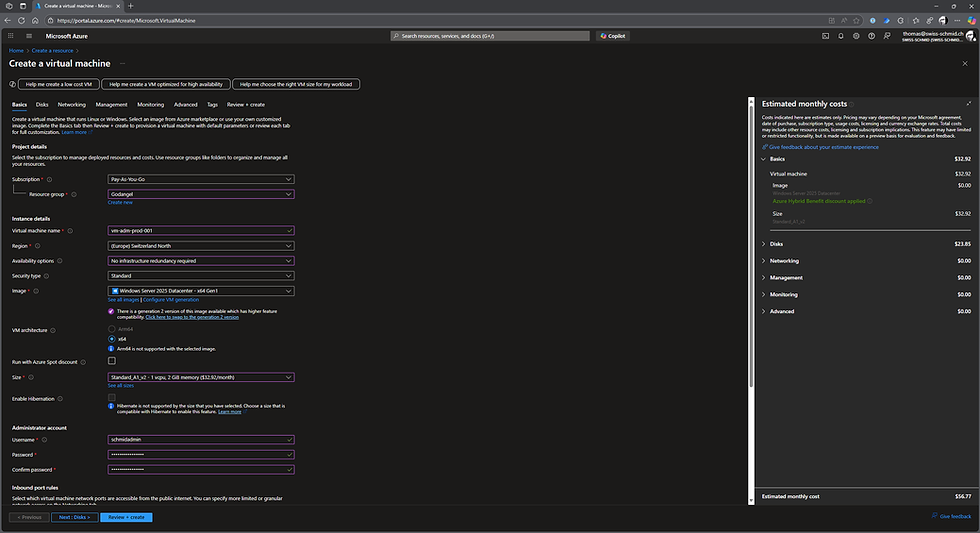
Fenster "Microsoft Azure - Create a virtual machine"
Register "Basics"
Abschnitt "Project details"Auswahl Subscription Pay-As-You-Go >
Auswahl Resource group Godangel >
Abschnitt "Instance details"
Eingabe Virtual machine name vm-adm-prod-001
❗Wichtig:
Da der Hostname im Windows als NetBIOS Name verwendet wird, ist es sinnvoll wenn der Name der Virtuellen Maschine nicht länger als 15 Zeichen lang ist. Sonst kürz Windows den Hostnamen und der Hostname der VM und der Name der VM in Azure sind nicht mehr identisch.
Auswahl Region (Europe) Switzerland North >
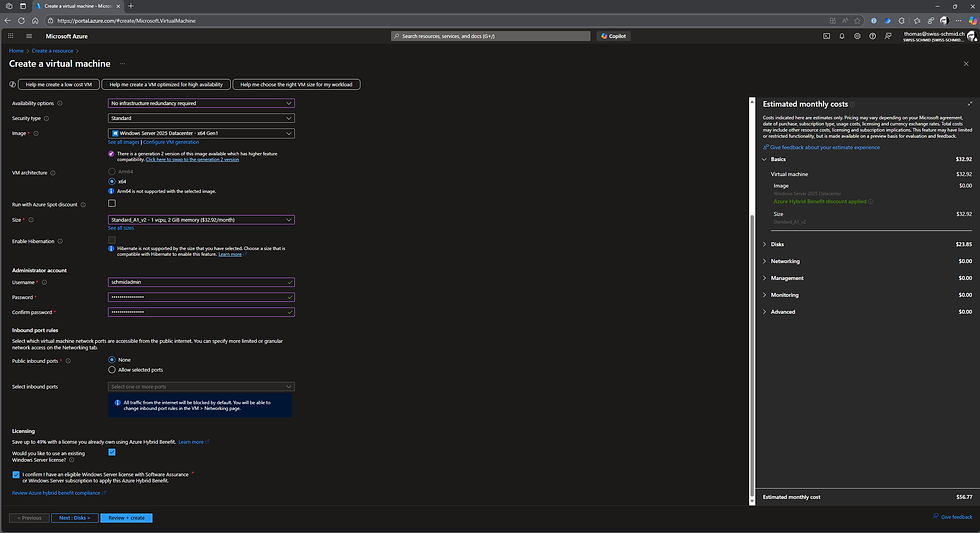
Auswahl Availability options No infrastructure redundancy required >
Auswahl Security type Standard >
Auswahl Image Windows Server 2025 Datacenter - x64 Gen1 >
VM architecture [x] x64
Run with Azure Spot discount [ ]
Auswahl Size Standard_A1_v2 - 1 vcpu, 2 GiB memory ($32.92/month) >
Enable Hibernation [ ]
Abschnitt "Administrator Account"
Eingabe Username schmidadmin
Eingabe Password *****************
Eingabe Confirm Password *****************
Fenster "Microsoft Azure - Create a virtual machine"
Abschnitt "Inbound port rules"
Public inbound ports [x] None
Auswahl Select inbound ports None
Abschnitt "Licensing"
Would you like to use an existing Windows Server license? [x]
[x] I confirm I have an eligible Windows Server license with Software Assurance or Windows Server subscription to apply this Azure Hybrid Benefit.
Next : Disks >
Fenster "Microsoft Azure - Create a virtual maschine"
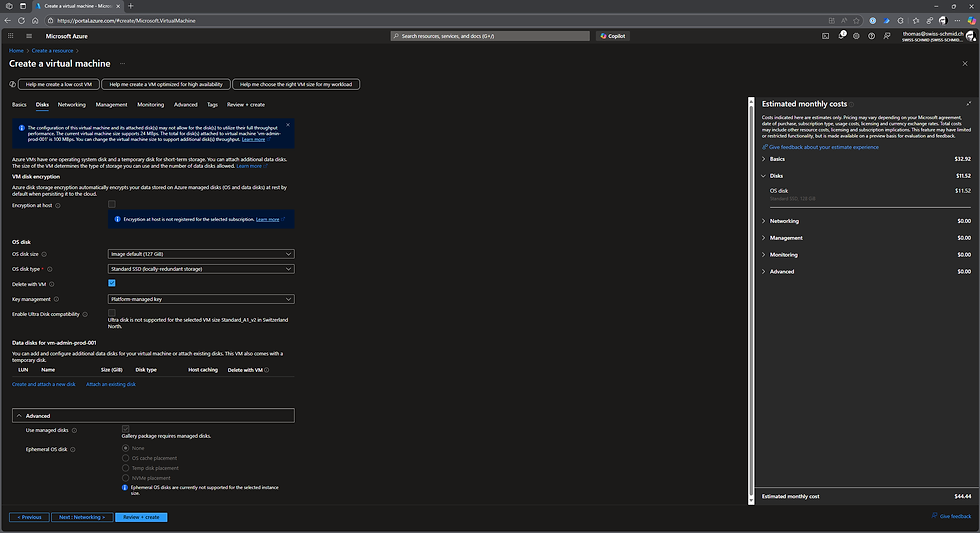
Register "Disks"
Abschnitt "VM disk encryption"
Encryption at host [ ]
Abschnitt "OS disk"
Auswahl OS disk size Image default (127 GiB)
Auswahl OS disk type Standard SSD (locally-redundant storage) >
Delete with VM [x]
Auswahl Key management Platform-managed key >
Enable Ultra Disk compatibility [ ]
Abschnitt "Data disks for vm-admin-prod-001"
Keine weitere Disks hinzufügen.
Abschnitt "Advanced"
Use managed disks [x]
Ephemeral OS disk [x] None
Next : Networking >
Fenster "Microsoft Azure - Create a virtual machine"
Register "Networking"
Abschnitt "Network interface"
Auswahl Virtual network vnet-prod-northswiss-001 >
Auswahl Subnet snet-prod-northswiss-001 >
❗Wichtig:
Es ist sehr wichtig, dass hier nicht das Subnetz ausgewählt wird in die die Entra Domain Services installiert wurden. Wählen sie hier unbedingt ein anderes Subnetz aus.
Auswahl Public IP None > (Wir benutzen Azure Bastion um auf die Maschine zuzugreifen)
NIC network security group [x] None
Delete NIC when VM is deleted [x]
Enable accelerated networking [ ]
Abschnitt "Load balancing"
Load balanding options [x] None
Next : Management >

Fenster "Microsoft Azure - Create a virtual machine"
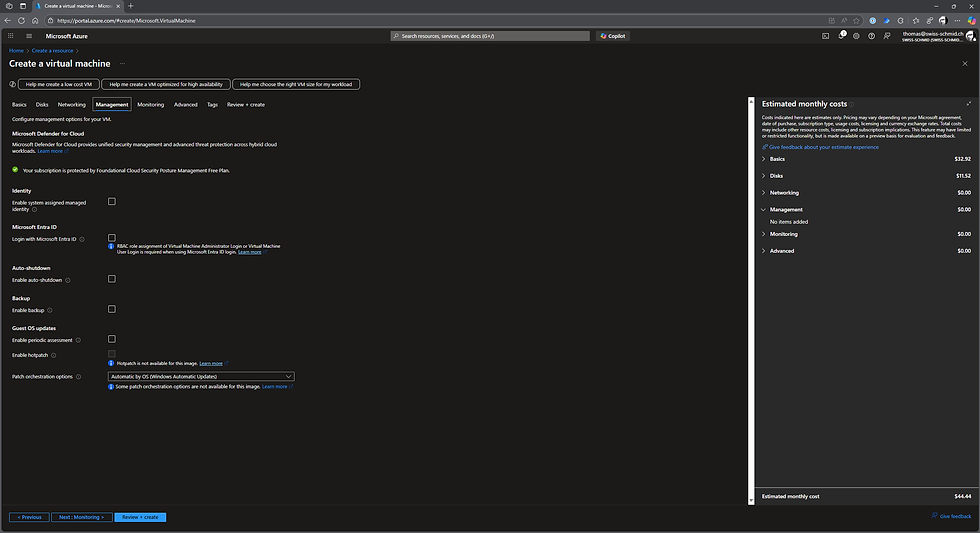
Register "Management"
Abschnitt "Microsoft Defender for Cloud"
Abschnitt "Identity"
Enable system assigned managed identity [ ]
Abschnitt "Microsoft Entra ID"
Login with Microsoft Entra ID [ ]
Abschnitt "Auto-Shutdown"
Enable auto-shutdown [ ]
Abschnitt "Backup"
Enable backup [ ]
Abschnitt "Guest OS updates"
Enable periodic assessment [ ]
Enable hotpatch [ ]
Auswahl Patch orchestration options Automatic by OS (Windows Automatic Updates)
Next : Monitoring >
Fenster "Microsoft Azure - Create a virtual machine"
Register "Monitoring"
Abschnitt "Alerts"
Enable recommended alert rules [ ]
Abschnitt "Diagnostics"
Boot diagnostics [x] Disable
Enable OS guest diagnostics [ ]
Abschnitt "Health"
Enable application health monitoring [ ]
Next : Advanced >

Fenster "Microsoft Azure - Create a virtual machine"
Register "Advanced"
Alle Einstellungen auf Standard belassen.
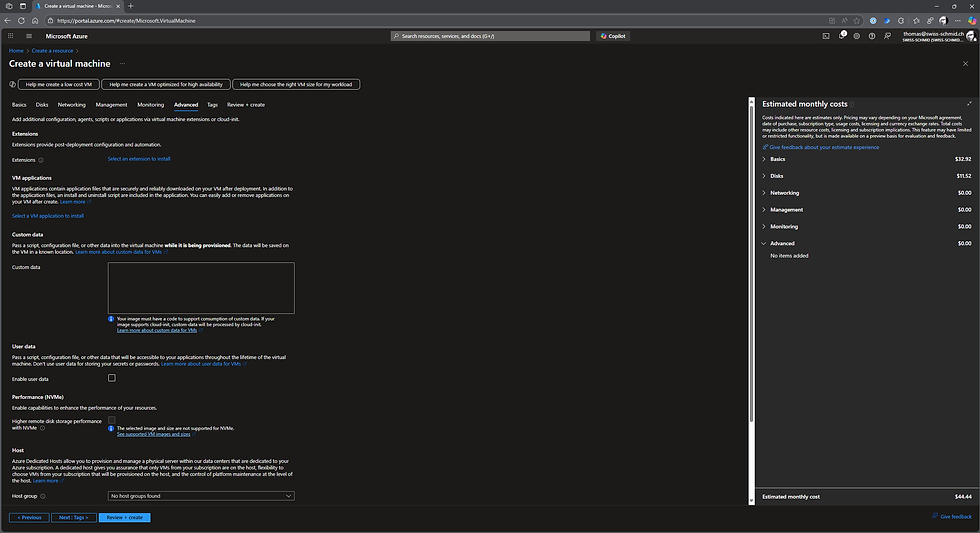
Fenster "Microsoft Azure - Create a virtual machine"
Next : Tags >

Fenster "Microsoft Azure - Create a virtual machine"
Register "Tags"
Alles auf Standard belassen
Next : Review + create >

Fenster "Microsoft Azure - Create a virtual machine"
Die Validierung der Einstellungen wird durchgeführt.
Create >

Die VM wird erstellt…
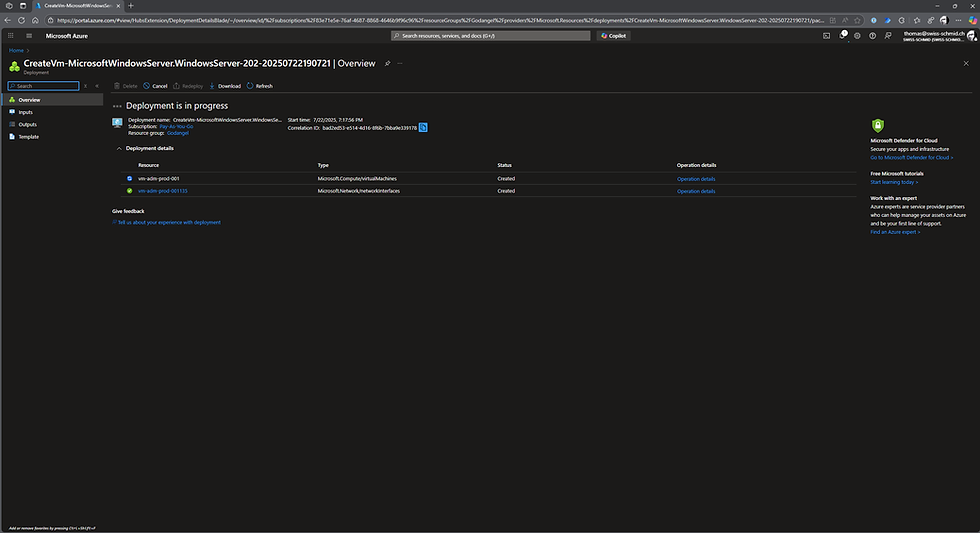
…und ist nach einer gewissen Zeit einsatzbereit.
Fenster "Microsoft Azure - Your deployment is complete"
Go to resource >


Kommentare